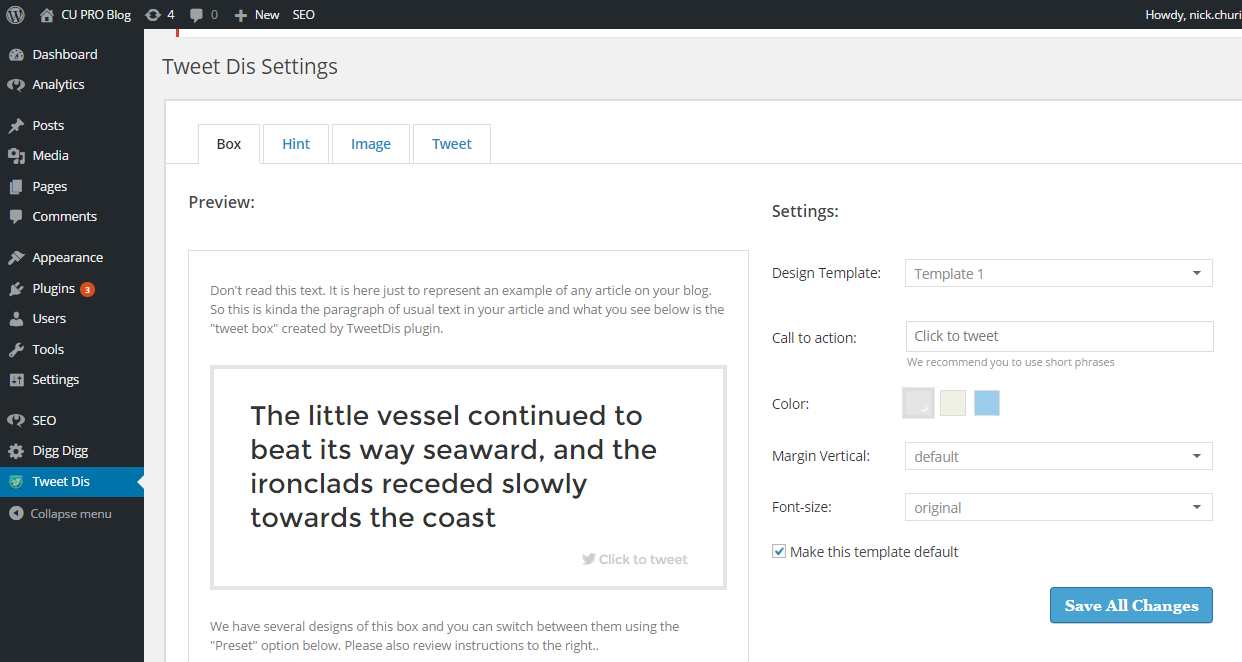
This manual will guide you through the plugin installation process. By its end you will be able to start creating awesome tweetable quotes.
1. Plugin download
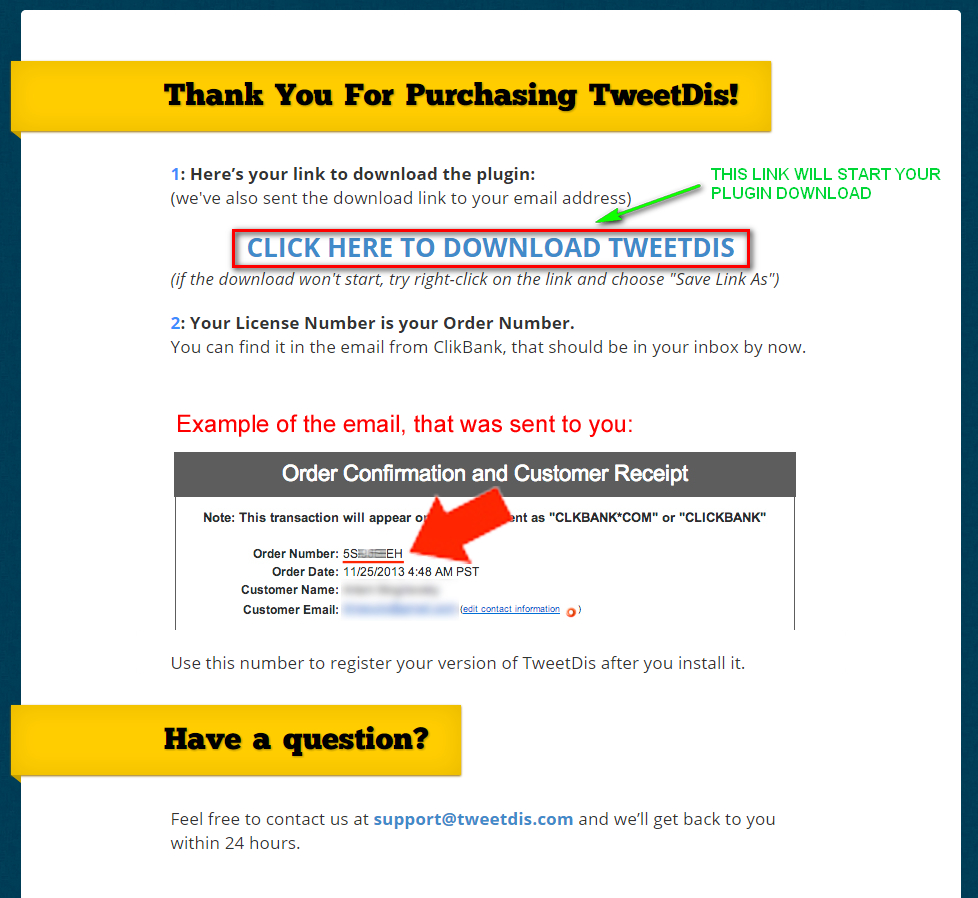
After you made your purchase via ClickBank, you will get your Order Confirmation e-mail.
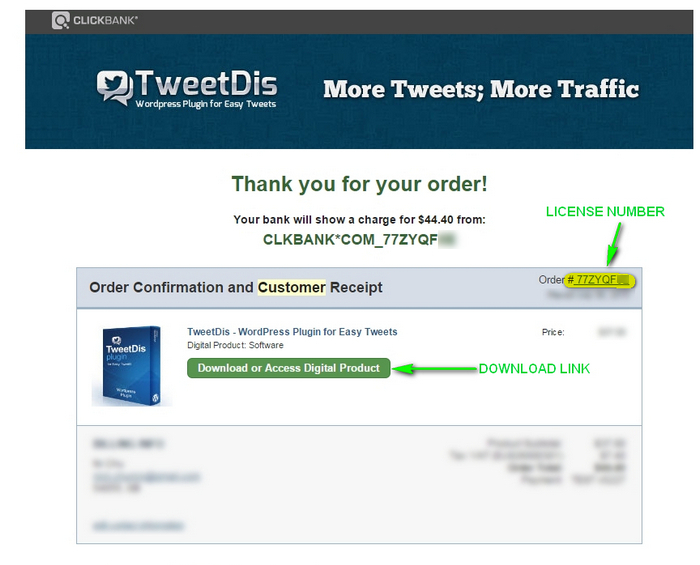
This letter has a link to plugin download as well as your license code (you license code is the same as your order number). Please see the image above.
Click “Download or Access Digital Product” button and you will get to the Plugin download page.
Click “CLICK HERE TO DOWNLOAD TWEETDIS“ and you will get a file tweetdis.zip. Save it anywhere on your computer, so that you can easily access it.
Note: do not unpack the file, leave it .zip format.
2. Adding TweetDis to your WordPress
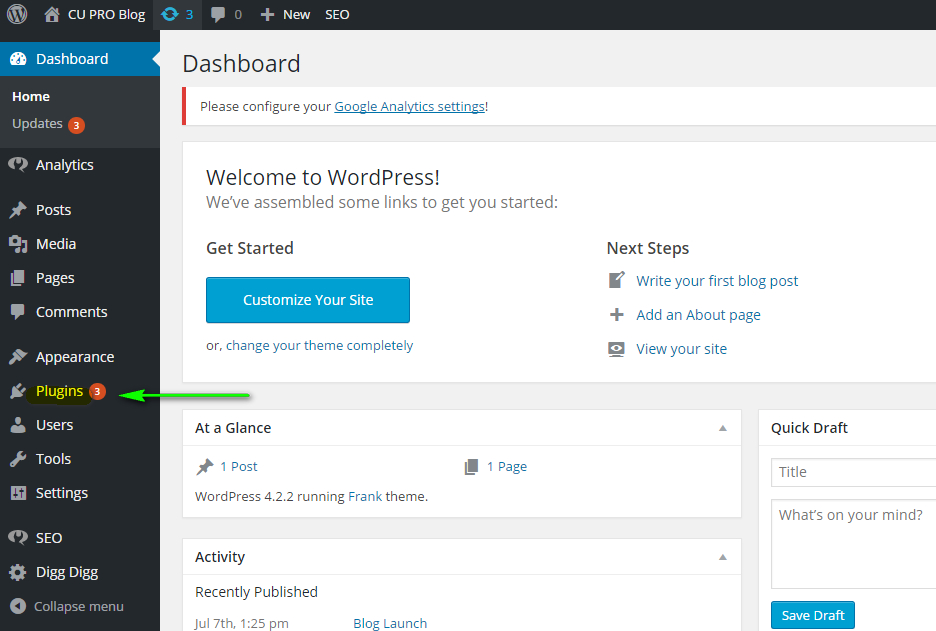
Go to your Website’s or Blog’s WordPress Admin panel and enter the “Plugins Menu“.
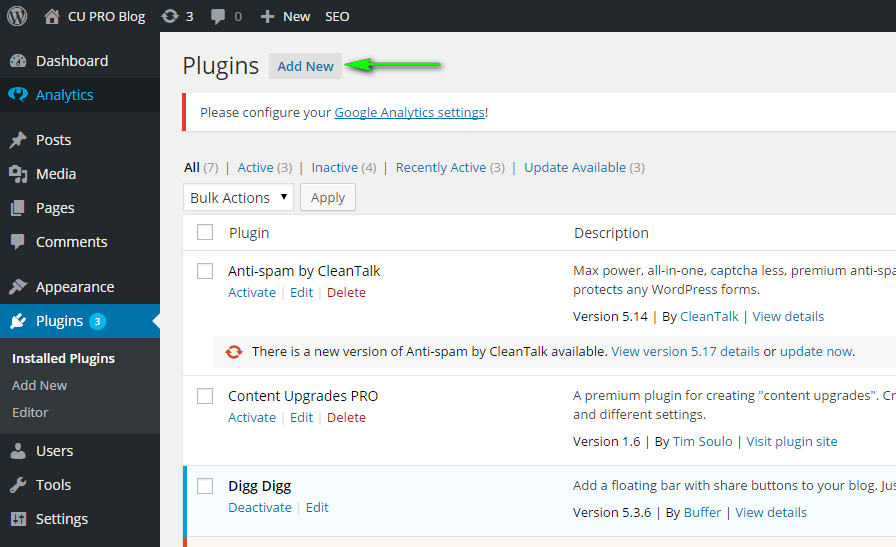
Click “Add New” button in order to add a new plugin.
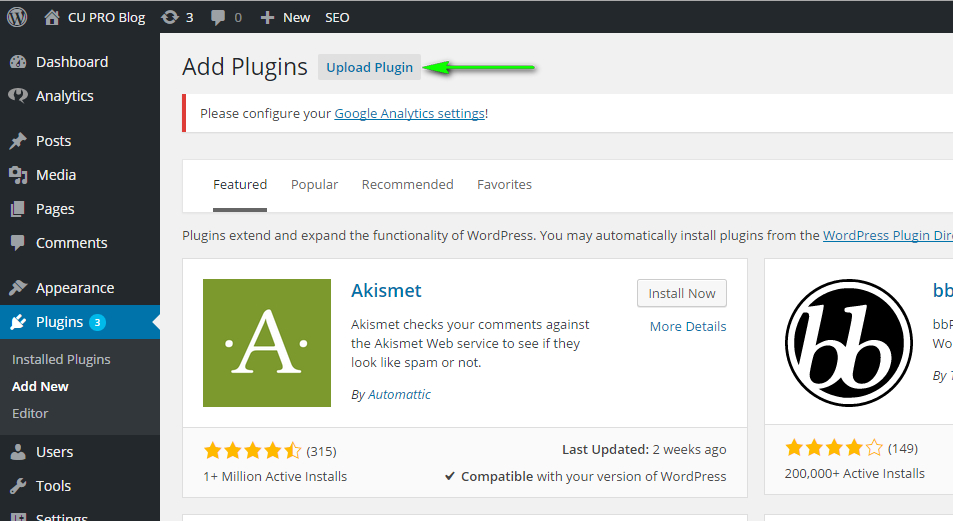
Now you should upload your plugin from your computer.
Click “Upload Plugin” button.
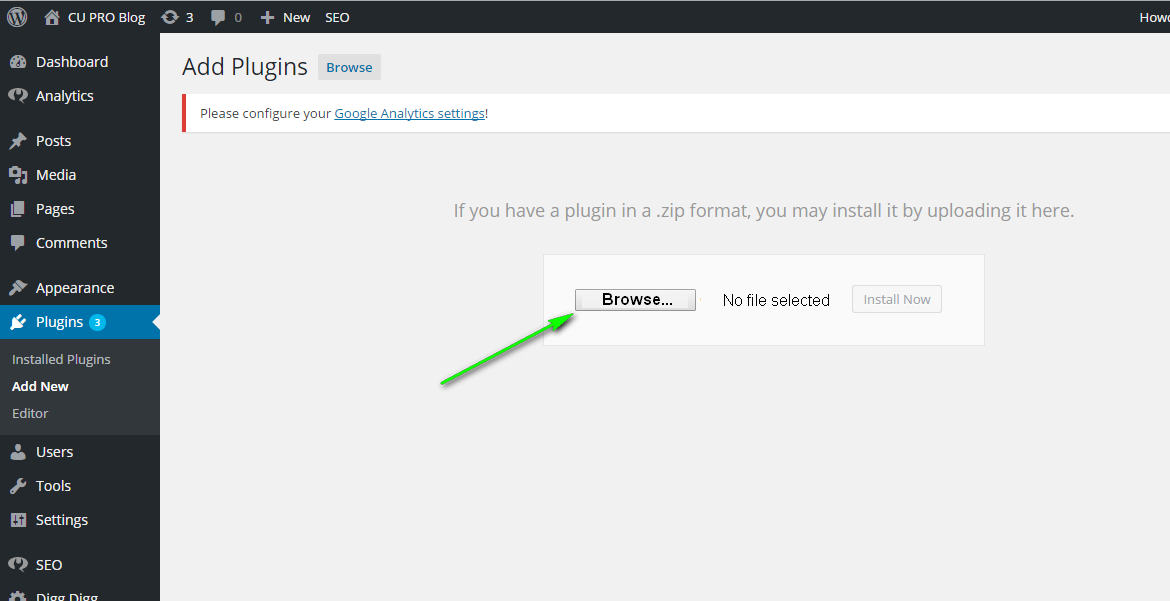
You will be prompted to select a plugin file in .zip format from your computer.
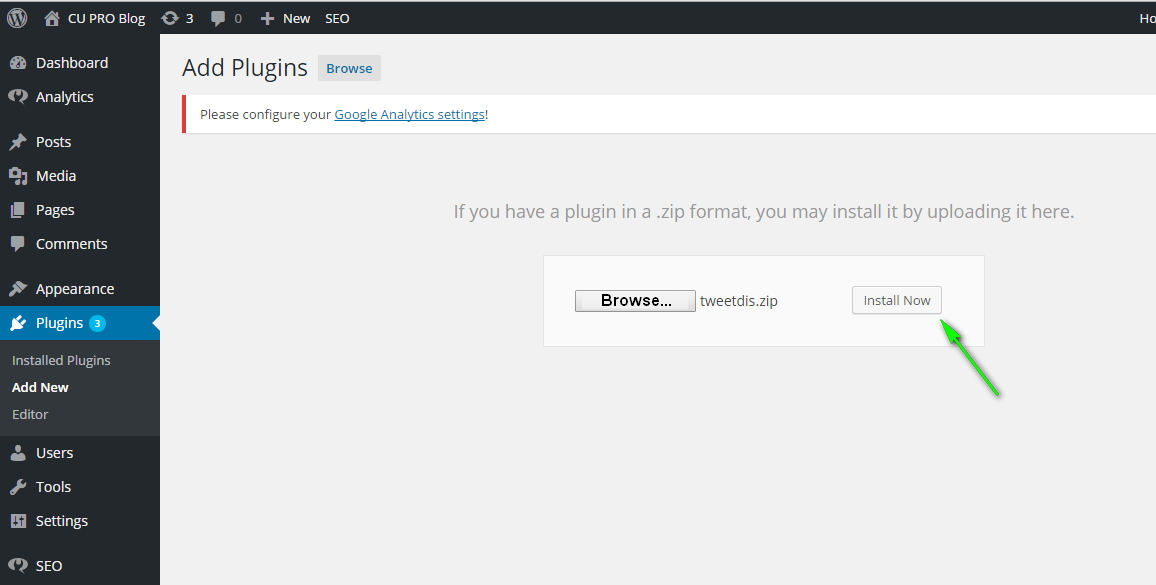
Click “Browse” button, select your plugin file and click “Install Now“.
Note: It can take some time to upload the file.
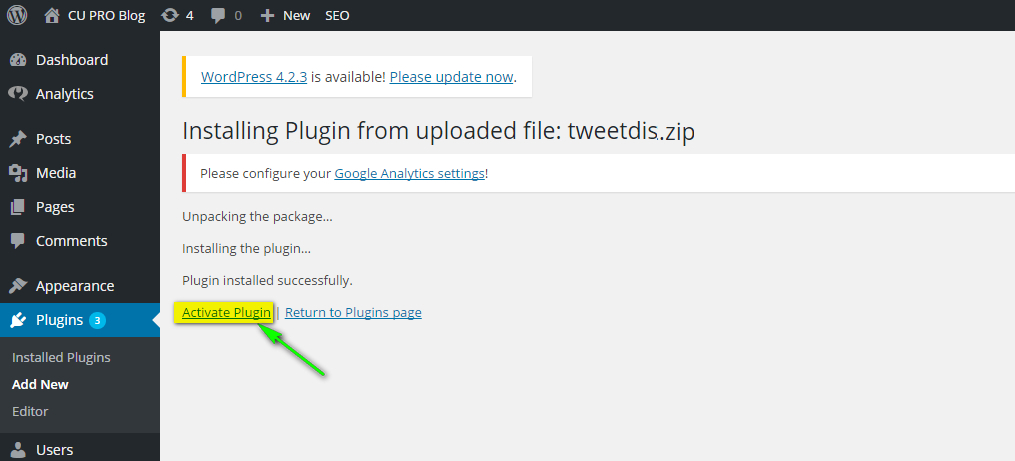
After you are notified about successful installation, click “Activate Plugin“.
3. License activation
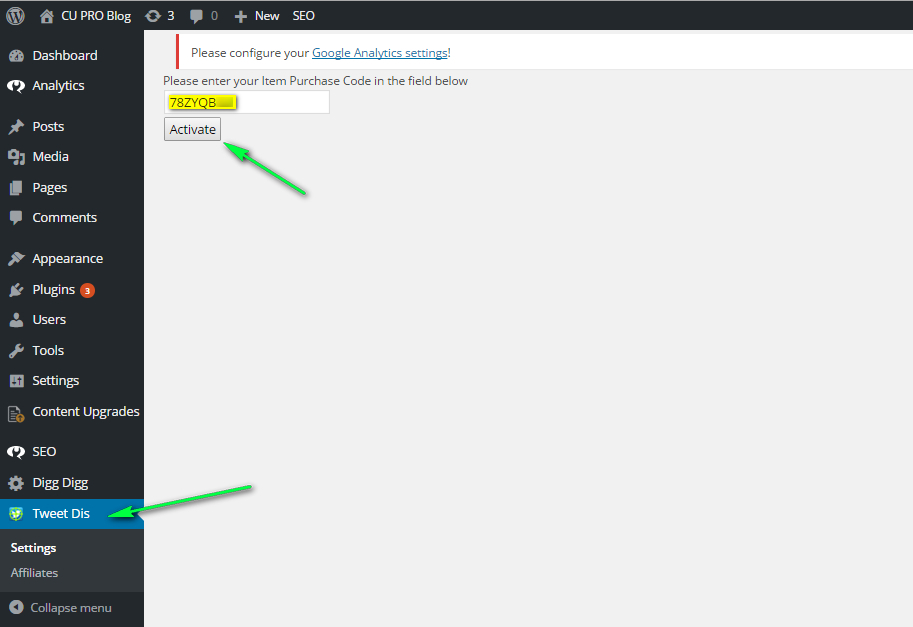
After activating the plugin, Tweet Dis menu will be added to your WordPress menu. Click it.
Enter you license number in the license field and click “Activate” button.
That’s it!
Now you are ready to start creating awesome tweetable quotes with our best click to tweet plugin. Pump out a hell lot of traffic from Twitter!
If you have anything to ask – do not hesitate to reach us out through our support form. We are always glad to help you.
 Tweetable Quotes | TweetDis Plugin Get More Tweets
